-
TYCO | Introduction
-
TYCO | Your home teaching space
-
TYCO | Lighting
-
TYCO | Focusing on focus
-
TYCO | Cameras: laptop webcams
-
TYCO | Cameras: smartphones
-
TYCO | Cameras: external webcams
-
TYCO | BONUS: Stuart Gauffi demos YouCam
-
TYCO | Cameras: DSLRs - Part 1
-
TYCO | Cameras: DSLRs - Part 2
-
TYCO | BONUS: The Evolution of a Look
-
TYCO | Microphones
-
TYCO | Clothes and makeup
-
TYCO | Framing and presenting
-
TYCO | Your tech setup: computer and internet
-
TYCO | Creating a great online classroom culture
-
TYCO | Celebrating the "online" in your online course
-
TYCO | Zoom: Overview
-
TYCO | Zoom: Safety settings - Avoiding the Zoombomb
-
TYCO | Zoom: Scheduling meetings
-
TYCO | Zoom: Countdown to meetings
-
TYCO | Zoom: Enabling/disabling chimes
-
TYCO | Zoom: Locking meetings
-
TYCO | Zoom: Confirm you're being heard
-
TYCO | Zoom: Confirm you're being seen
-
TYCO | Zoom: Mute/unmute mics, start/stop video
-
TYCO | Zoom: Raising/lowering hands
-
TYCO | Zoom: Managing text chat
-
TYCO | Zoom: Sharing your screen
-
TYCO | Zoom: Arranging chat/attendee screens when presenting
-
TYCO | Zoom: Sharing student screens
-
TYCO | Zoom: Managing breakout rooms
-
TYCO | Zoom: Running polls
-
TYCO | Zoom: Using a digital whiteboard
-
TYCO | Zoom: Removing participants
-
TYCO | Zoom: Managing recordings
-
TYCO | Teaching on Facebook Live
-
TYCO | Creating recorded lessons using Loom
-
TYCO | Creating recorded lessons using Screenflow (and all my other production tools)
-
TYCO | Expanding your teaching "portfolio of opportunity"
-
TYCO | Conclusions and takeaways
-
TYCO | Please take a one-minute survey
-
TYCO | Your cash reward for referring other students
-
TYCO | Complete equipment recommendation list and links
Participants 3


Enlarge this video to full screen by rolling over the bottom of the video frame, then click or tap on the four-corner icon at the far right of the toolbar. When this video is finished, click or tap on the blue Mark Complete button below to move on to the next step (if it’s gray, finish watching the video). If there is no button, you choose another topic from the list on the left.
[Introduction] So, why is lighting so important? Why do we worry about lighting? What’s the big deal? Turn the light on and shoot some video, right?
Understand that lighting is that moment of a first impression. Studies have been done, for years, talking about just how quickly someone can create a first impression, and how quickly others judge you, from the moment they see you. And when they first see you on video, what they’re seeing is how you’re lit. Yes, they’re seeing your image, yes they’re hearing your voice (and we’re actually going to talk about that when we talk about cameras and microphones). But that first impression — three tenths of a second — can you believe that? That’s how quickly people make a snap judgment about you.
Cameras aren’t as capable, as our eyes are, of adjusting to the lights in a room. So what a camera sees is very specific, compared to our eyes. And so how we’re lit really, really matters. It instantly communicates your professionalism, the time and the care that you’ve put into doing this, and it really reflects on you and how you care about your students (your class, your tribe). It sets a tone of how important this video is, that you’re not messing around, you’re really, really serious about this. And it puts the viewer’s mind, almost unconsciously, at ease about what’s going to follow. It’s like, “Ah! They know what they’re doing. They’ve lit themselves great and so it’s going to be great!”
And lighting also helps direct people to the important parts of what you’re showing. Mostly it’s your face and any object that you’re demonstrating when you’re doing your work. It sets you up for success in all that you’re doing in your session, in your course. It raises your profile as an SME, as a subject matter expert. And as I said, it’s not just the lighting — it’s your camera, it’s your microphone, it’s how you look, it’s how you sound. But all of those things work together to help raise your profile as a teacher. So let’s talk about lighting, in this lesson in Teach Your Course Online.
[Video pre-roll] So here we’re going to take a look at lights.
You want to take advantage of any natural light, if you can. A window can be great, as long as it’s not too bright, it’s not too glaring. Usually what you want to do is use lights that are more controllable, because as the day goes on, your light will change, from a natural light from a window.
Lights don’t have to be expensive. A couple of table lamps, placed properly, maybe up on some higher shelves, will work just fine.
If you are using lights that can be pointed in a particular direction, make sure that they are aimed right at your face, right at your head. Put one to the left of you and above you, and the other to the right and above you, both about 6-10 feet away from you, kind of a 45-degree angle, right? On the right-hand side, you want to use a 100 watt bulb. That’s the one on your right. On your left-hand side, you want to use a 60 watt bulb. So it’s more powerful on the right. The one on the right is called your key light, the main light. The one on your left is called the fill light. Now, that puts more light on this side of your face, and less on this side. It’s called two-point lighting. So you’re not evenly lit on both sides, which doesn’t look as interesting as if you’re lit well on one side and not as much on the other.
If you want to look even better, put another behind you and to your right or to your left. That’s called your hair light or your back light. (Even though I don’t have hair…) It helps outline my head. That’s called three-point lighting, and it’s how Hollywood lights most scenes.
Now I’m going to demonstrate how this works…
- [switches off all lights] Oooh scary kids, all the lights are off! I’ve actually got a room light from the other room, just so you can see the outline of what I’m doing. But the first thing I’m going to do is I’m going to turn on the key light, and that’s going to be up and to my right. And when I turn that on, you’re going to see that it lights the right-hand side of my face. So let’s take a look at that.
- [switches on key light] So, there we go. That’s with my key light on, but it kind of looks like I’m sitting in the middle of a stage somewhere, with a spotlight shining down on me. There’s a lot of shadows underneath my face. The key light does a good job of giving light, but what we want to do is even things out. We want to add a fill light, so let’s do that.
- [switches on fill light] There we go, now we have a fill light, but it’s not as bright as the key light. The key light is, let’s call it 100% and the fill light is more like 50-60%. That’s why I said use a 100 watt bulb if you’re going to put a lamp close to you, and use a 60 watt bulb if you’re going to put a lamp close to you on the other side. So, key light 100%, fill light 50%. Now I mentioned you can make it even better-looking and more like Hollywood (get that “cinematic” look), by adding a third light — a hair light, a back light. Here’s what that looks like.
- [switches on hair light] There you go. See the difference? It’s subtle, but it makes a big difference. It helps outline my head a little bit better.
When you’re doing this, you want to use LED lights for a consistent look, and also to keep the temperature down. You want to put them in the same place every single time. I’ve linked to a 3-light LED panel kit (about $150), and it comes with stands, so you can set them up in the same place all the time. There’s a link below this video, where you can find them.
If you want to diffuse the light a little bit, you can use tracing paper or baking parchment, if the lights are a little glaring.
Don’t light yourself from above. It looks very “industrial.” If you just use your ceiling lights, that’s bad.
You don’t want to light yourself from below either, because it looks a little creepy.
Now, one final thing. Don’t use a ring light, especially if somehow you’ve positioned it away from where it belongs, which is right around the lens. Ring lights are for YouTube influencers and Instagram makeup un-boxers who want to work close to their cameras, and show you what they’re doing. Those lights are designed to be mounted, again, around the lens of the camera. If you put it six feet away, a ring light, it’s just a light then, that happens to be shaped like a ring. And it’s not good for your use anyway. We’re professionals, we want to look good for our students in class.
That’s it! Not that hard, huh? That’s lighting.
I think this is the last time I tell you to do this, but click the Mark Complete button below, and I’ll see you in the next lesson.
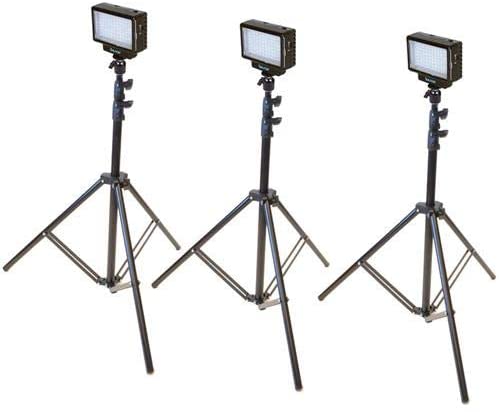
Bescor 3 Point LED kit with stands:
https://voheroes.com/get-ledlightkit
Responses